Quick start guide
Installation
Set up your Reshape Imaging System by following these steps:
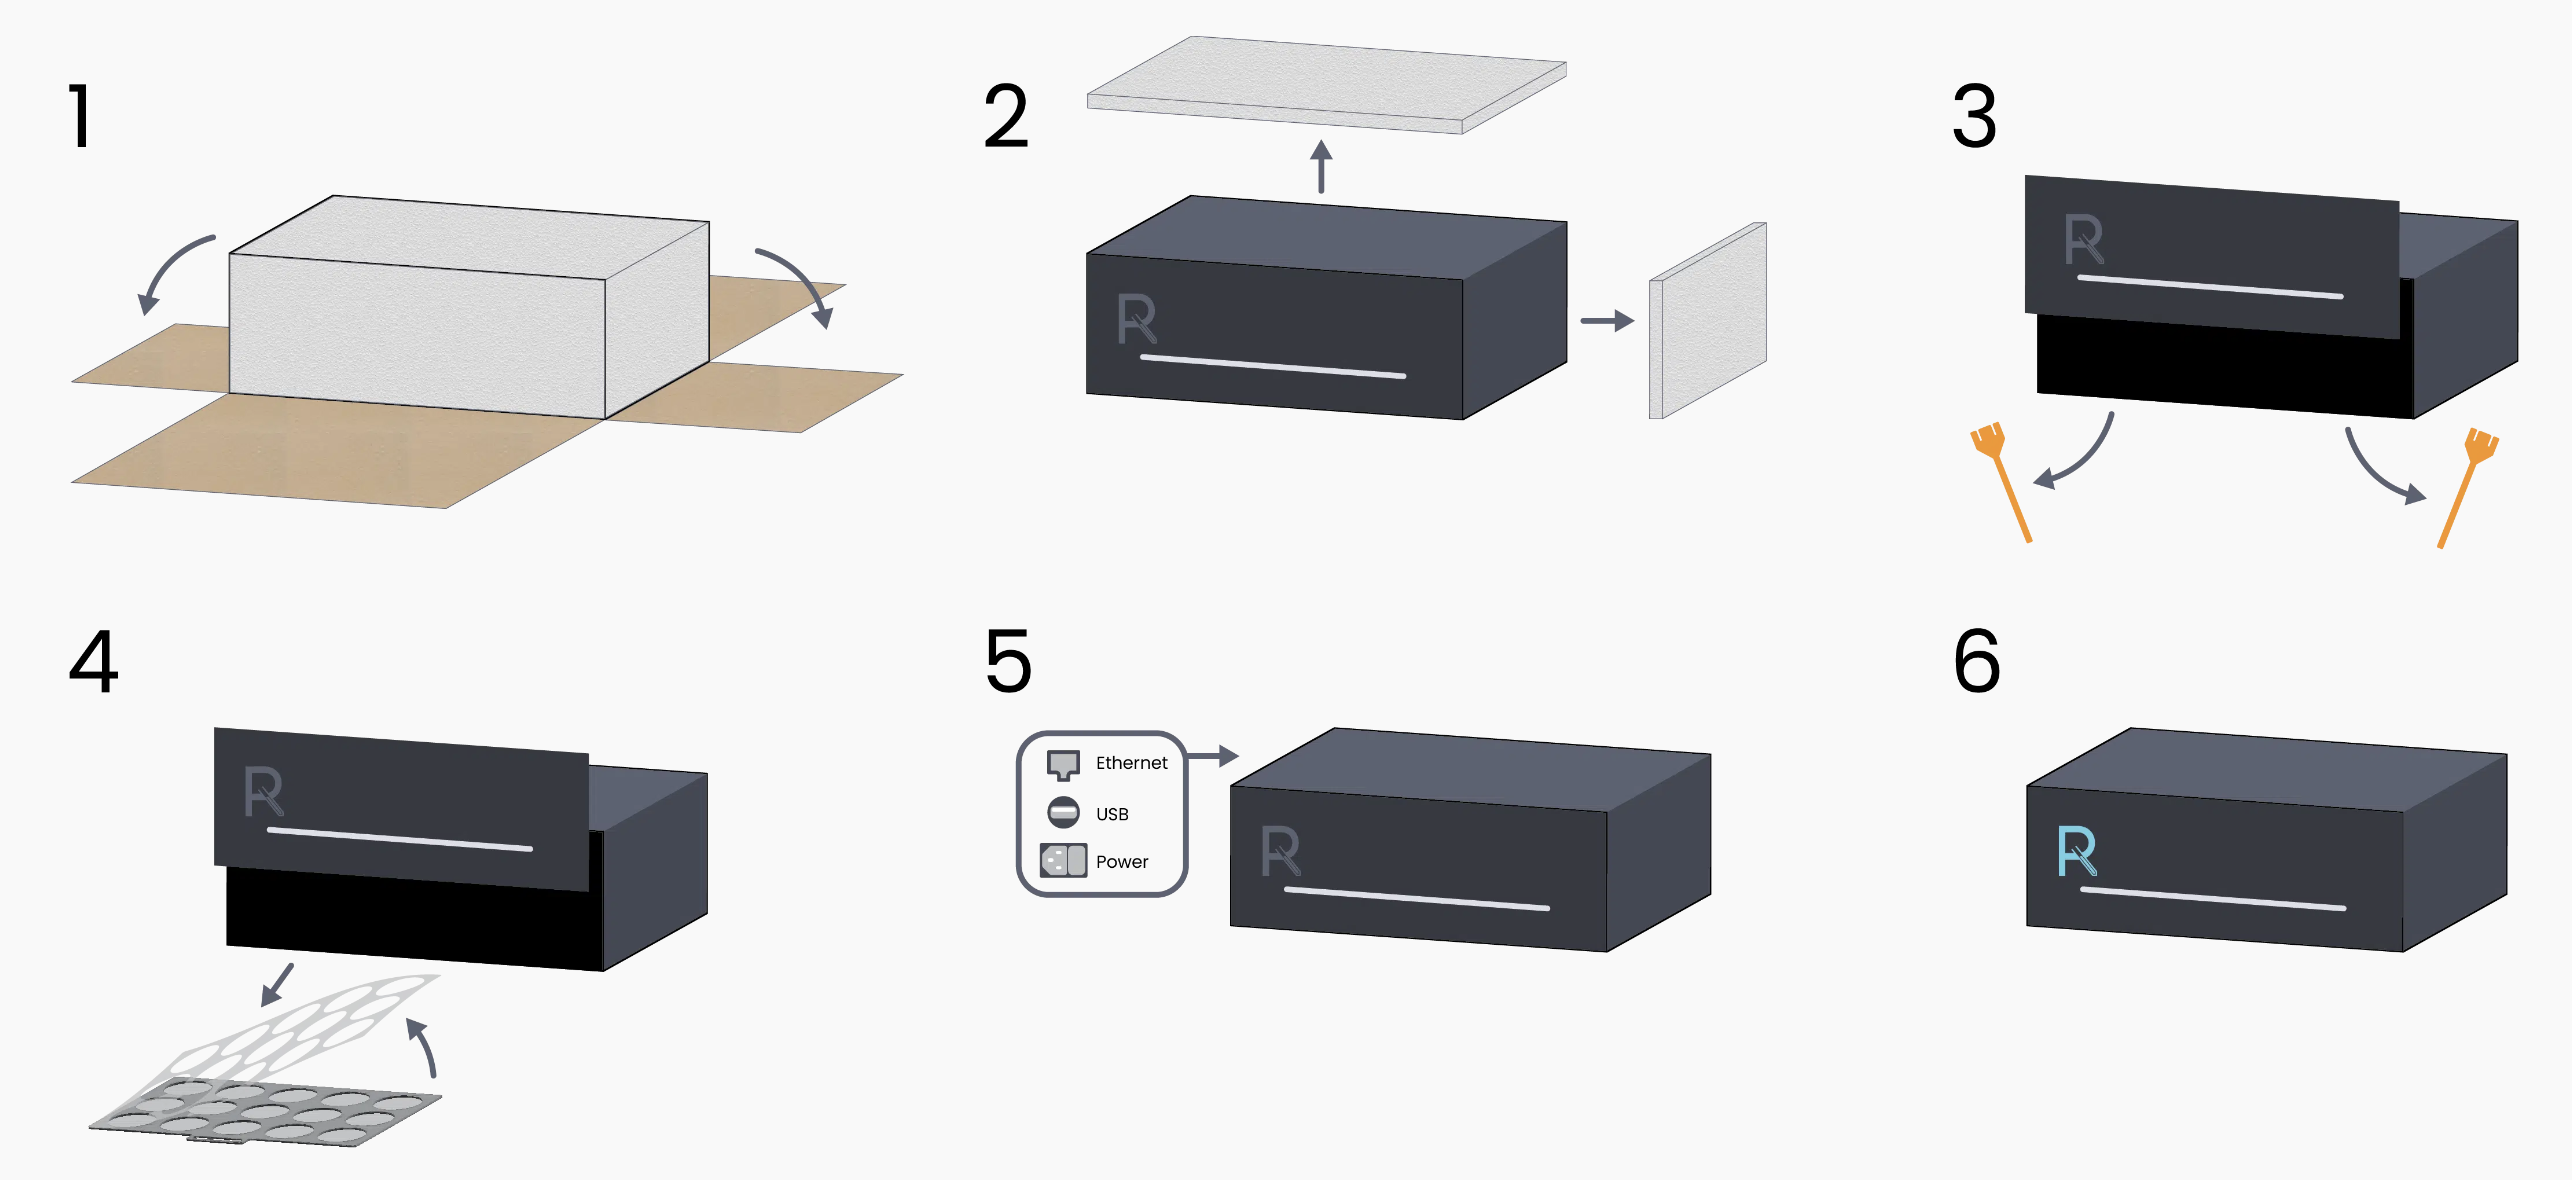
1. Open the cardboard box. Do not dispose of the box until site acceptance test is complete.
2. Remove the external foam
3. Open the door and remove the triforks located in each side in the front of the machine by twisting and pulling downwards (see the figure below)
4. Along with the robot one or more plastic trays are provided. These are either black or white and are used to hold petri- or microtiter plates during imaging. Peel off the protective foil covering the surface.
5. Plug in the provided power and ethernet cables on the left side
6. The logo in front should light up after approximately 30 seconds
Connect to your Reshape Imaging System
You have received an onboarding email which contains login information. Using this, please log in at ris.reshapebiotech.com. To test whether the robot has internet connection, use the “+”-icon, also called “New job” button in the left sidebar (see the figure below). Name the job, for example “Connection test” and leave everything else at default. Press “Submit new run”.

Afterwards, you’ll see the page showing the results for that particular job (see the figure below). Press the “Job List” in the sidebar or refresh the page to update the status of the job. It should go from “pending” to “started” just a few seconds after being submitted. If this happens, the connection is established. If it is stuck on “pending”, you most likely have something blocking the robot from gaining internet access.

Start a new job
To prepare for a job follow these steps:
1. Load the plates onto a tray. During imaging, the lids should always be left on plates. This is both to prevent them from drying out and to minimize potential cross-contamination
2. Open the door, slide the tray into the machine and close the door
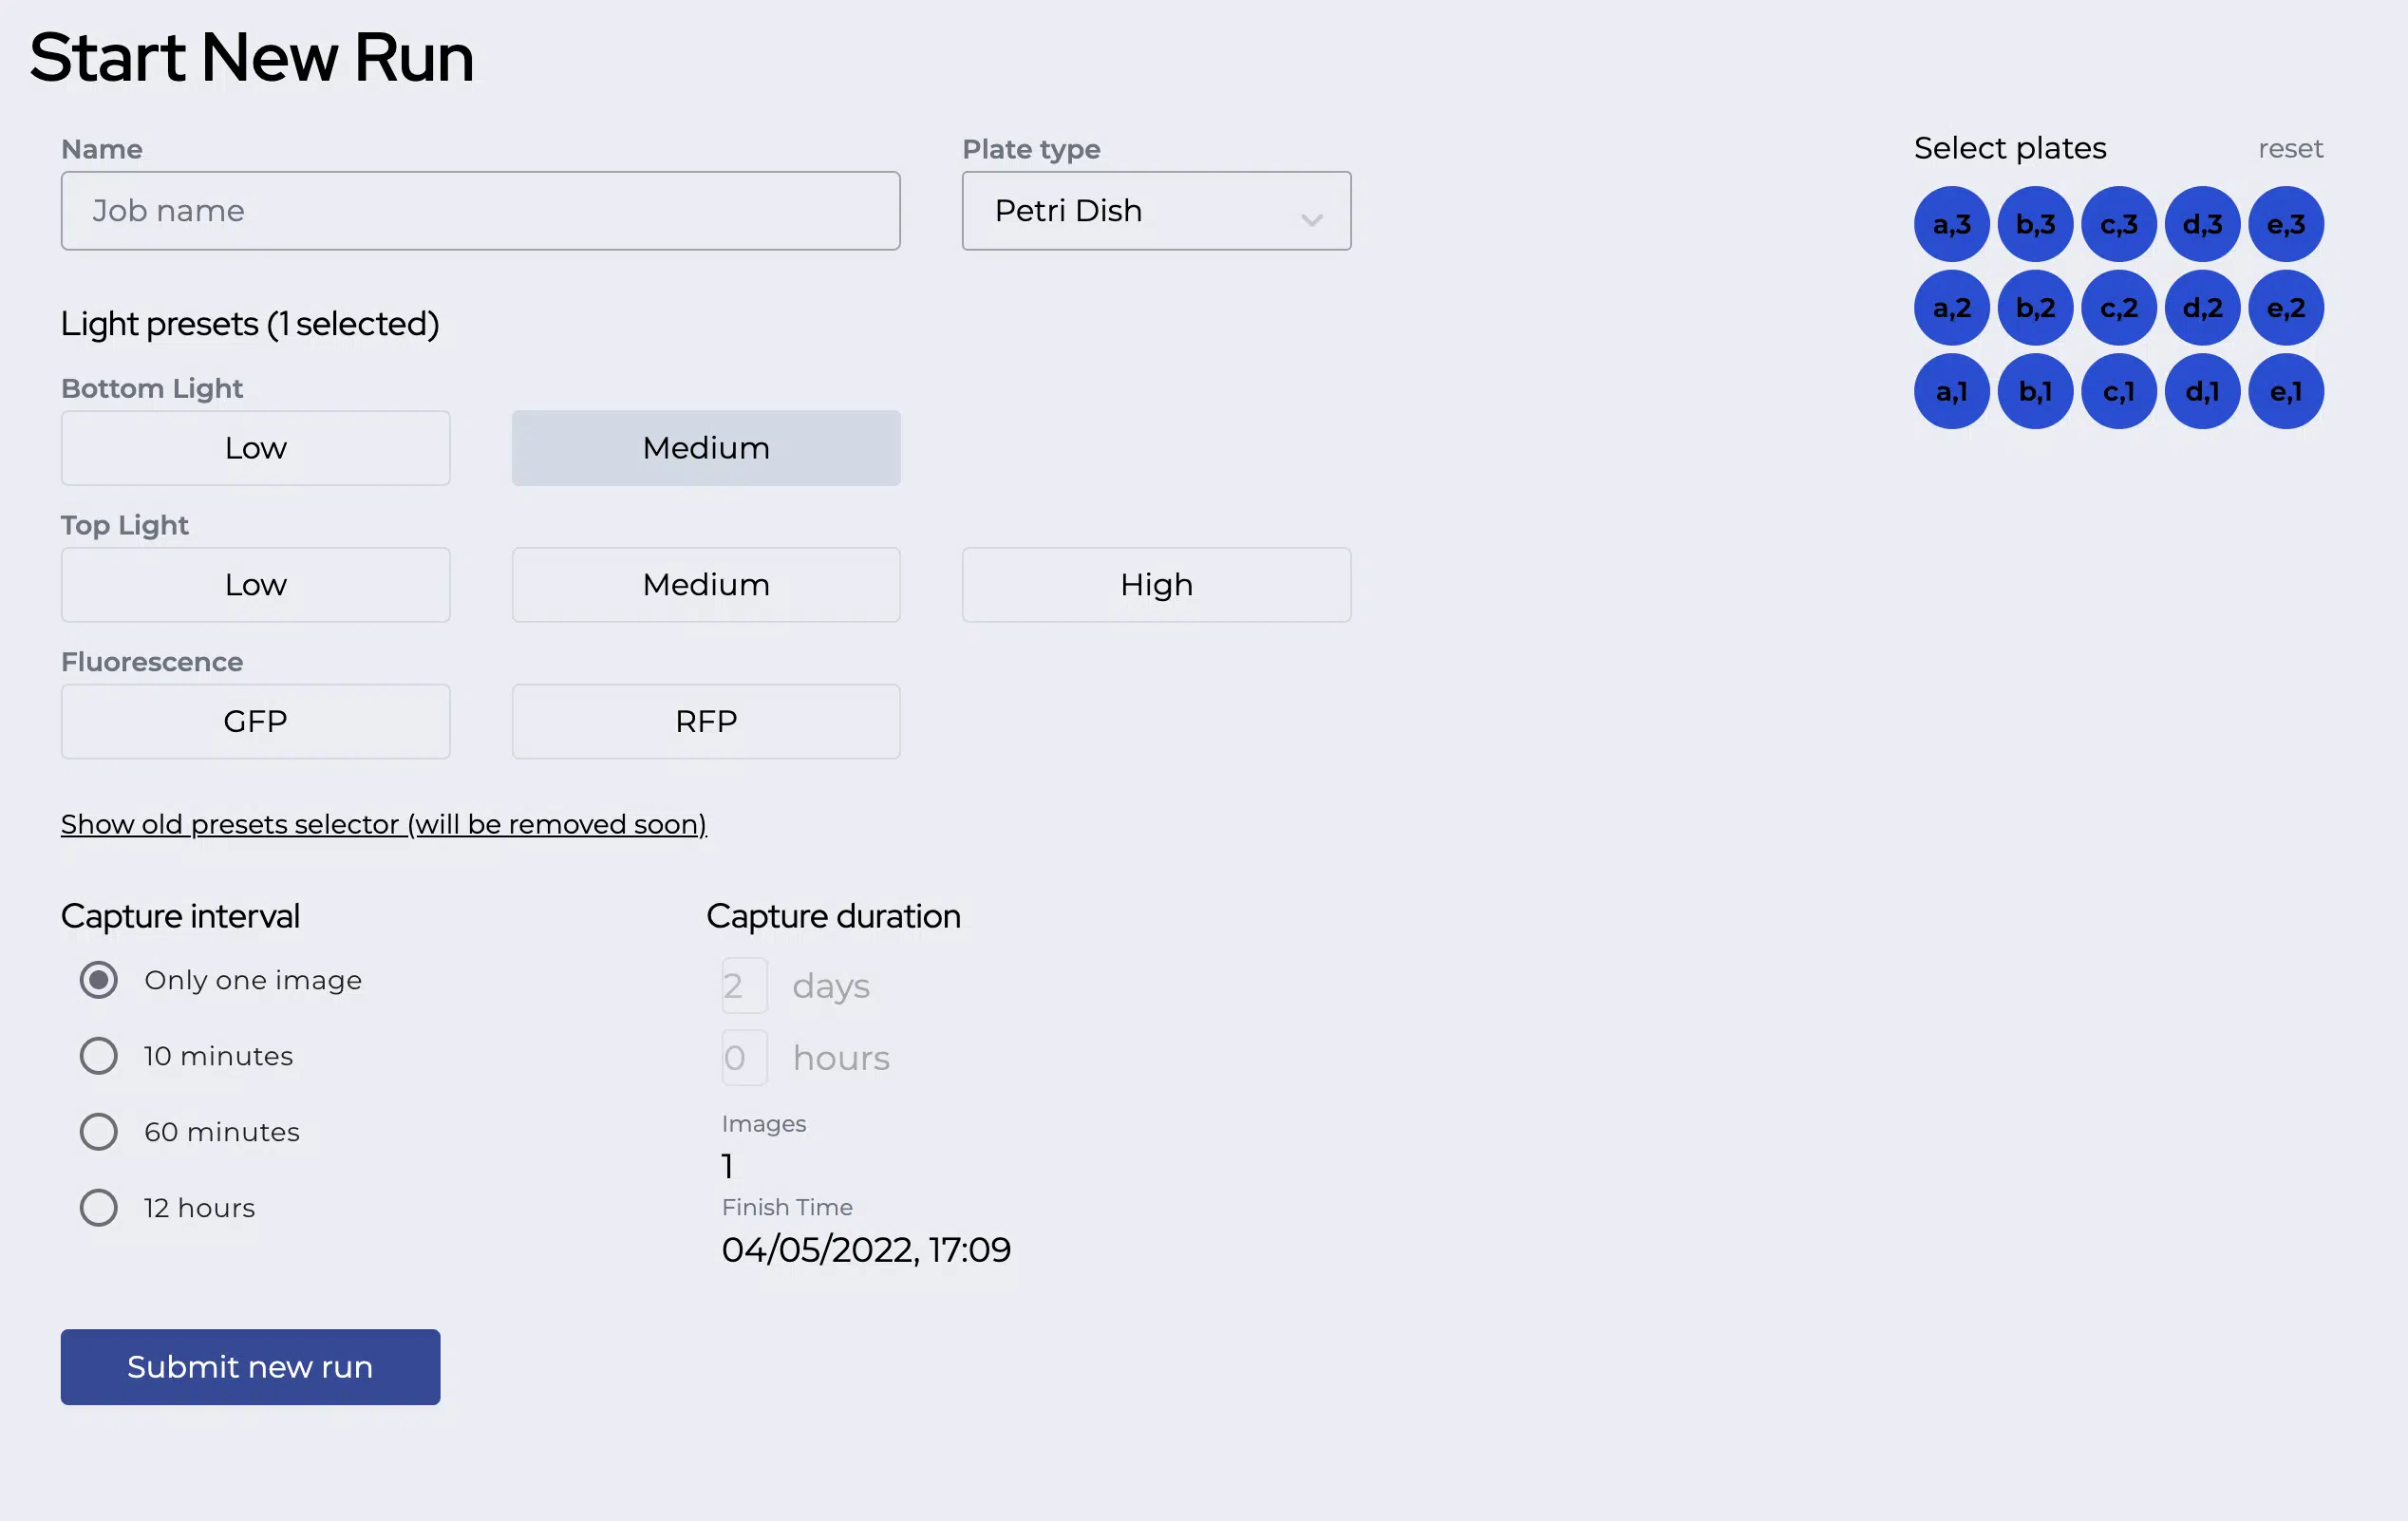
3. Log in to the user interface on ris.reshapebiotech.com and start a new job (see the figure below)
Before submitting the job configure the following:
1. Job name – this can be anything, and is just used for you to reference the different jobs
2. Plate type – here, you select the plate type used. This will change the zoom and focus to fit the particular type of plate and method of scanning over the plates to image individual wells.
3. Plate selection – here, you can select which plates to be imaged during the job. Dark blue will be imaged, grey will not be imaged. All plate positions are selected by default
4. Light presets – here, you can select the lighting type(s) to be used during the job. Simply enable one or more presets by toggling the buttons. In general, the default option (Medium Bottom Light) is good for most types of experiments.
5. Capture interval and duration – select whether you just want a single image taken, or alternatively, how often the imaging should happen between each image. If an interval is chosen, you’ll also be allowed to select the total duration the image capturing should run for as well as when the job will finish.
Press “Submit new run”. The job status will change to “Started” and the imaging will start within 30-60 seconds.
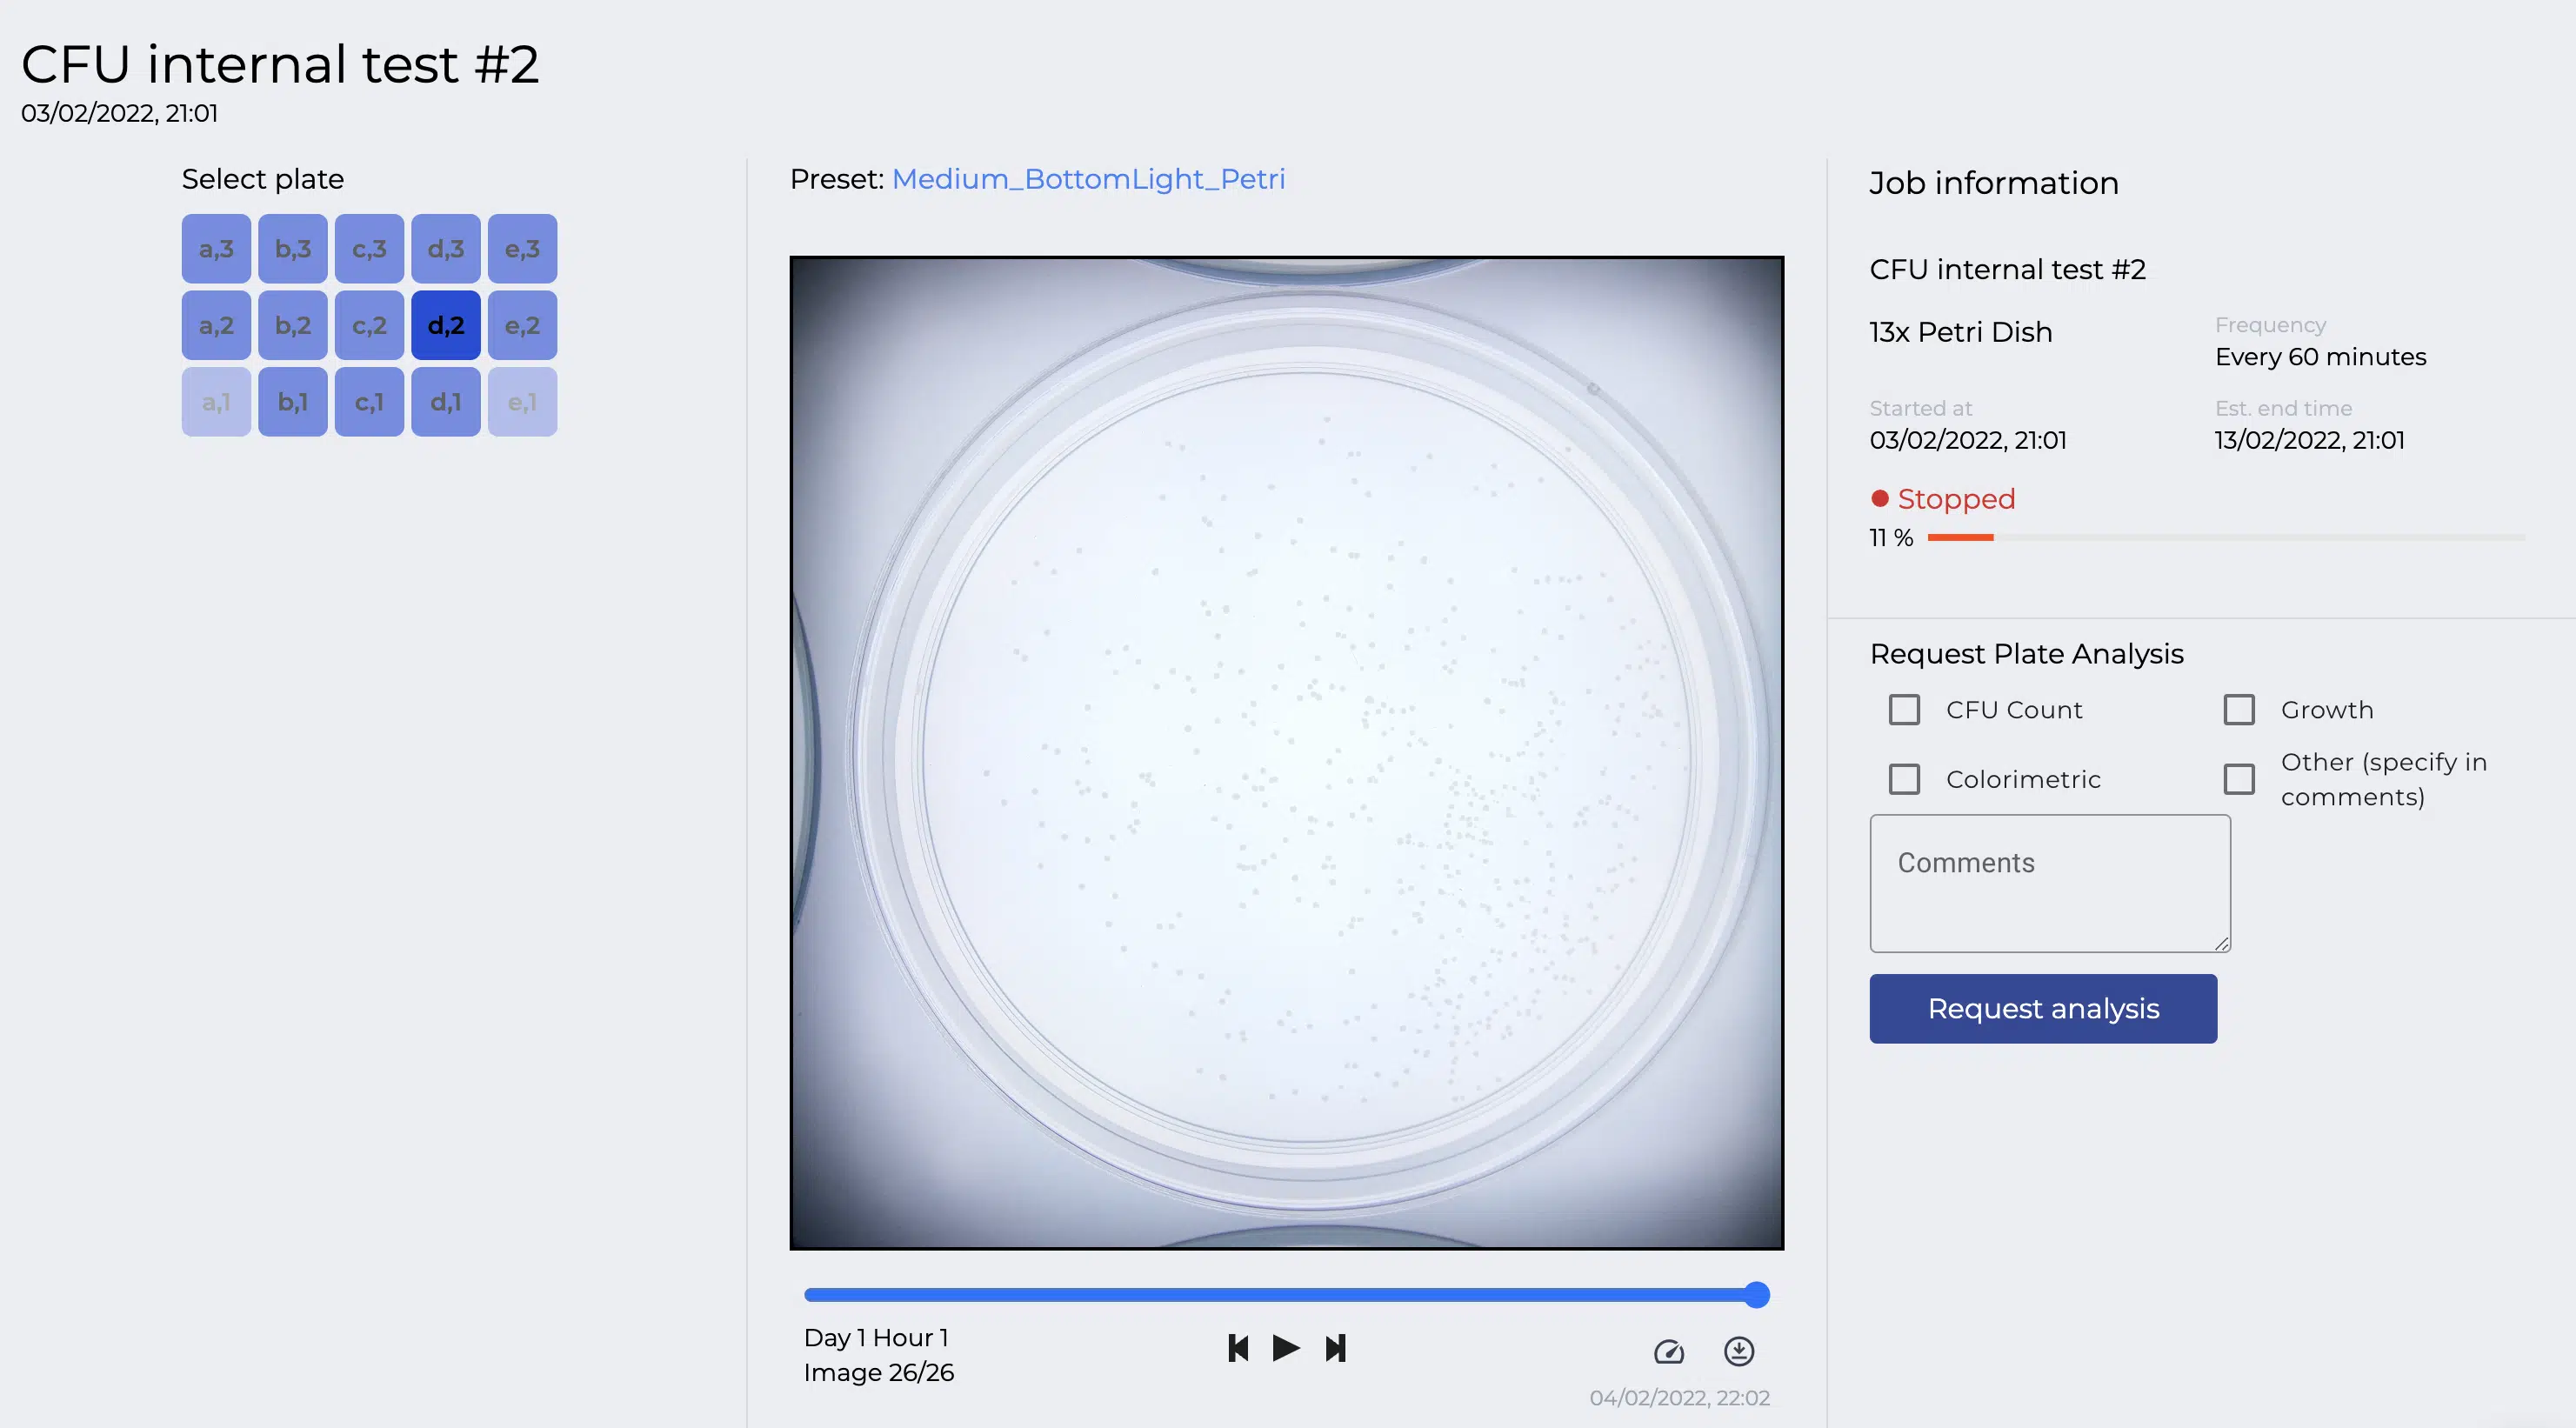
After the job has started, you’ll start seeing images in the job view. Here, you can follow the progress for each image taken and scroll back and forth in time. You can also download images or videos.
The “request analysis” is used by customers who are subscribed to the Reshape Analysis Suite, and is the way to enter jobs into our analysis pipeline, after which we will process them and return the results.
Cleaning
The Reshape Imaging System and trays can easily be cleaned using ethanol or a soap-based wipe. Simply open the door, take out the tray and wipe it down. The opening in the door is wide enough that you can wipe down the large internal surface inside the robot as well.
Contact info
Feel free to contact Reshape Biotech at any point if the machine is causing issues or not behaving as expected.
We’re also happy to help discuss lighting presets or specific assays as necessary. You can reach us via the chat option on the website, at support@reshapebiotech.com or call Magnus directly at +45 4292 1548.